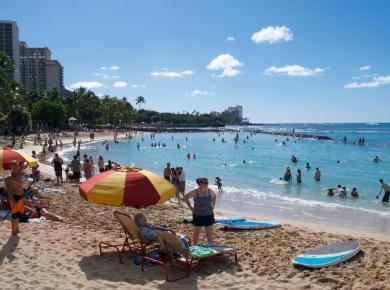
When we vacation in Hawaii, we want to bring back as many memories as possible. Of course, capturing a few great photos can help us jog our memories as well as show our friends and neighbors what a beautiful place it is. While Hawaii is inherently photogenic, I want you to bring back better than good Hawaii vacation photos. I want you to bring back the best vacation pictures that you possibly can.
At Go Visit Hawaii, we’ve published several photography tips and Q&As from professional Hawaii photographers. So, I thought I’d organize all the best vacation photography tips into one convenient spot.
Positioning The Subject Of Your Photo
When you’re taking a photo of your family, travel companions or scenic object, give some thought to positioning before you snap that photo. The novice (like me) tends to position the person or object in the center of the camera’s view finder. We also tend to center the horizon. While that may take a nice photo, that’s not what the pros do. Oahu photographer, Joe Philipson, says, “Our eyes and brain tend to prefer a photo if the subject is placed off to the side…If you go through a lot of stunning photos you’ll notice that the subject is almost never placed in the middle of the photo or the horizon is towards the top or towards the bottom.”

Looking Your Best In Your Hawaii Vacation Photos
Natalie Norton from Oahu is an absolute pro at taking the most stunning portrait photos.She makes her clients look like rock stars! (She publishes some of her work on her blog www.natalienortonphoto.blogspot.com. I’m hoping that Andy and I will be able to arrange a photo session with Natalie one day.) So, I asked Natalie for her advice on how to look your best in vacation photos. Natalie tells us:
- Relax! You want a picture that makes you feel the aloha all over again and again and again every time you see it. You don’t want a shot with a forced smile that every time you look at it you can hear yourself muttering through a clenched (however “smiling”) mouth saying, “Take the picture already!”
- Turn on a slight angle. It’s more flattering to the physique. . . but don’t go crazy or you’ll look like your posing. . . that’s not good either.
- Try not to shoot photos of your loved ones in sun that’s directly overhead. The angle of the sun will produce unflattering shadows. Step into the shade and take advantage of overcast days.
Taking That Amazing Sunset Photo
Our very own Go Visit Hawaii photographer, Andy Beal, explains why the typical point and shoot camera will often miss the real colors of sunset that your eye sees. Then he explains how to trick your camera into capturing a better sunset photo.
If you point your camera directly at the setting sun, and press the shutter button, you may well end up with a picture that, while pretty, doesn’t really capture the beautiful colors you saw with your naked eye. This is because the sun is very, very bright–obviously–so your camera’s built-in computer tries to compensate for this brightness, which often leads to the rest of the sky looking somewhat “blah” while the sun looks blurry.
A neat trick is to point your camera just above the setting sun. Press your shutter button half way down–like you do when you’re looking to get your camera to focus on someone–then, with you finger still half-way pushed down on the shutter button, move the camera back down so you can see the sun in your viewfinder. Once, you’ve done that–remember to keep your finger half-way pressed all this time–finally push down fully on the shutter button. I won’t bore your with the techno-photography-babble of why this makes great photos, but basically it allows the camera to capture the colors of the sky and the setting sun.
Another great tip that Andy shared on taking better sunset photos builds upon what Joe Philipson explained to us on positioning. Andy tells us, “Compose your sunset picture with the sun either slightly to the left or right of center, and place the horizon so that it’s not squarely in the middle of the viewfinder. You’ll end up with a Hawaii sunset picture that draws people in and impresses the socks off your friends and family.”

Capturing Great Vacation Photos of Children
When I asked Natalie how to get the best photos of children while on vacation, here’s what she had to say, “Get down. I often lie on my belly to shoot kiddos–eye level is a good way to gauge. Don’t be afraid to get up close either by zooming in or physically walking closer to your child. I really really really REALLY try never to say “Smile!” or “Say Cheese” etc. A forced smile on your little angle is like cow manure (pardon my French) compared to their genuine array of expressions. Also, sneak up if you can. Candid shots of little ones are just priceless.”
Natalie went on to add that you should be patient and take lots of shots. “Rather than getting one nice posed picture of your child’s “picture face,” get him/her laughing and then click 10 frames as fast as you can. . . chances are one of them is BOUND to be a real doosie!”
——
You can read more from Natalie, Joe, and Andy in these articles:
- Advice For Taking Incredible Vacation Photos From A Hawaii Photographer
- Advice On Choosing A Wedding And Family Portrait Photographer in Hawaii
- Vacation Photo Advice from Oahu Photographer Joe Philipson
- Andy’s Photography Tips: The Perfect Hawaii Sunset Picture
One last point I’d like to add is that it would be a good idea to practice these tips at home before your vacation. By giving yourself some time to experiment, you’ll be more comfortable with the techniques and snapping like a pro on your Hawaii vacation.
Any other tips that you’d like to add from your experience?


6 comments
Great advice!
To which I would add, get to know your camera. Most digital cameras have scene selection settings which let you quickly optimize the camera to match what you are shooting, action, sunsets, and so on. A little time spent with your camera manual now can make for much better pictures later. 🙂
David
All great tips. I’ve been a fan of Joe for awhile now, and Andy’s photos have always impressed me.
I’d like to echo one of those last tips from Natalie about taking multiple shots, not just trying to get the perfect one. I’ll typically take 2-3 shots of the same scene, just to have a few to compare later on my computer instead of that tiny LCD screen. I also throw my camera into continuous shooting mode (the picture of the running guy on most cameras) for things like the Black Rock Cliff Dive Ceremony on Maui, on whale watches, or even at luaus where you can get a few quick photos to compare which one you like better.
All, I’ve been encouraged not to stand in the same spot when taking photos. In other words, keep moving and approach as scene from different angles and perspectives. If you see a crowd with 10 people shooting the same scene, you’ll have the same exact photo as them. If you walk around, either closer or at a different angle, you might end up with something even better. This paid dividends for me on our last trip to Hana.
Lastly, I’d say… Share, Share, Share. I absolutely love Flickr for sharing Hawaii photos and getting some great ideas and inspiration. As much as I like to take photos when in Hawaii, sitting back and just admiring the photos from others is just as rewarding.
@ David – good point. Taking a little time to read the owners manual and practice the features will pay off dividends with pictures that wow.
@ Kris – Andy & I definitely admire your photos, as well!
Thanks for adding your thoughts. I hadn’t thought about the moving approach. Makes sense. Flickr absolutely rocks. I could easily spend hours each day looking on flickr if I didn’t cut myself off. 🙂
great tips. you could actually use these techniques when taking photos of other great spots, not just Hawaii.
@ traveller – You’re right, we can use these techniques in any situation.